Ham Radio Conditions/MUF

We are starting our Rocky Mountain Survival Search and Rescue (RMSSAR) net. We are hoping that you will join us internationally on HF, and locally on 2 Meters. Please contact me, W7WWD, at rmssar@gmail.com for information on times and frequencies.
Showing posts with label Alternative Energy. Show all posts

Thursday, May 16, 2013

A Primer on Propane for Prepping and Survival


Propane TankCall it serendipity if you will but a couple of months ago when I was contacted by Chris Newman, inventor of the InstaBed Cubic Foot Garden System, I had no idea that I was about to meet and get to know a really smart guy with MacGyver like skills and knowledge in all aspects of prepping and survival.
Chris has been generous in sharing his knowledge with me – from gardening to solar energy to grains and more – and has graciously agreed to become a technical consultant to Backdoor Survival.  He is doing this in the spirit of spreading the preparedness message and hopefully making our world a bit greener and more livable in the process.
Today I am thrilled to share a primer on propane that Chris wrote specifically for Backdoor Survival. He covers a topic near and dear to me personally since my household cooking and heat as well as my backup generator is fueled by propane.  And whereas my home is served by a large, community-based propane tank, I now have some workable strategies for stockpiling a backup supply of propane in portable tanks not only for my own use but for barter purposes.
Read on.
INTEGRATING PROPANE INTO YOUR PREPPING STRATEGY – PART ONE
This article covers the basics of propane as an important prepping energy resource. The subjects include safe propane handling, storage, assembling a stockpile of bulk tanks for long term storage at the lowest possible cost and refilling the smaller one pound canisters that are commonly used with portable camping gear, for about 1/5 the cost of new. We’ll also examine a variety of entry-level propane appliances and their suitability in a survival scenario.
Why Propane?
For convenience, value, air quality and long term storage stability, nothing beats propane.
Firewood is cheaper, if you have access to it and you don’t count the value of your time. But, when you’re burning all day and every day, it isn’t all that convenient if you have to go out and cut/gather it yourself. The stuff is heavy, especially if you’re hauling it a long distance. And, how are you at swinging an ax for hours at a time?
If you’re short on survival labor, which is a fair probability, having the option to cook with propane for an extended time, at least until things settle out, will let you channel that considerable fuel-wood time and energy into other important tasks, such as hunting and growing food, or warding off predators. Also, the ease of using propane allows the delegation of cooking etc. to a lesser-able member of your party, allowing all to contribute to the general welfare.
A Hedge Against Inflation
From an investment standpoint, the prices of both propane and the hardware/appliances that use it are directly tied to monetary price inflation – the “hidden tax” that steadily gnaws away at the purchasing power of your hard-won savings. Inflation is currently being deliberately manipulated to keep it low for now, but some price categories, like food, are still skyrocketing, with wages not keeping up. And, the economic stage is strongly set for hyper-inflation in the not-too-distant future.
So, one of the best investments in pre-inflationary and inflationary times (aka hedges against inflation) is hard goods and consumables, like food, that you’ll be using anyway and that will surely cost even more in the future. In other words, to combat inflation, the best place to store your surplus wealth is in tangible stuff, not pieces of paper, or electrons. For sure, no matter how the future shakes out, the retail prices for propane and propane hardware won’t be getting any cheaper, and they probably will go up by a lot.
Properly stored, both fuel and hardware will last indefinitely without degrading, ready to use on a moment’s notice. For all intents and purposes, unlike food, there’s no limit to its shelf life.
So, you’ll save money in the long run, anyway, by stockpiling consumables. But, if the grid goes down, there won’t be any more propane available to buy at all and the value of your investment will go way up. So, the larger your stockpile and the smaller the appliances that use it, which use less fuel, the longer it will last you.
If you play your cards right, you can stockpile at least a year’s worth of cooking and minimal lighting fuel for an average family (10 full five gallon bulk tanks that are equal to 200 small green canisters) for about $200, and do so $20 at a time.
Safety First!
If not handled with respect, Propane is DANGEROUS! As in dynamite dangerous and AK-47 dangerous. As in blowing up your whole house into kindling dangerous. This isn’t vegetable oil. So, treat it with prudent caution and always, always, always read, understand and follow the safety directions that come with every propane product.
Never store tanks of propane indoors or in any other sealed environment. Especially, if you see, smell or hear a gas leak, shut off the source immediately and then fix the problem before you continue. If you can’t shut it off, move away, warn others and cross your fingers. Otherwise, you’ll very likely go up in a cloud of smoke and all your hard-won prepping will have been for naught.
On the plus side, propane has been used as a consumer product for nearly 100 years and stringent government regulations require hardware designs that are fairly, if not perfectly, fool-proof. So, it’s not like you’re handling nitroglycerin. But, unless you really know what you’re doing, don’t try to modify or override the hardware safety features.
Unlike gasoline vapors, pure propane is nontoxic, though it’s certainly not healthy to breathe it and you should avoid it as you would with wood smoke. However, as with all combustion, there’s a real risk of oxygen depletion in a sealed room and proper ventilation should be an ongoing consideration. If you find yourself starting to gasp for air, triggered by a buildup of carbon dioxide, that’s an early warning sign that the oxygen is running low and it’s time for some fresh air, no matter how cold it might be.
Unlike natural gas, propane is heavier than air (1.5 times as dense). In its unburned state, propane vapor sinks and pools at the floor level. So, simply opening a couple of high windows to vent a leak may not be enough: You need to open a door or something else at ground level to let the heavy unburned vapors “drain” outside to disperse.
Liquid propane, say from a broken hose or leaking tank valve, will flash to a vapor at atmospheric pressure and the vapor appears white due to moisture condensing from the air. A big cloud of propane in the open air will blow up with the slightest spark, even static. So, you want to avoid coming even close to these.
Those basic risks described, however, if you treat propane with respect and understanding, there is no better fuel to stockpile for long term storage and multiple uses in survival situations, at least where you are not on the run, and while it lasts. Especially, when you use propane for just vital things like cooking and night lighting, the use rate is surprisingly low and a little propane will go a long ways.
What is Propane?
Propane is a gaseous byproduct in the refining of both oil and natural gas. It can be compressed into a liquid at relatively low pressures and will readily convert back into a burnable vapor under any conditions which humans can tolerate. First synthesized in 1910, it has been in commercial production since the 1920′s and the technology of using it at the consumer level is very well refined.
90% of all propane used in the US is from US sources, with 70% of the remaining amount coming from Canada. So, using propane fuel doesn’t fund jihad by our enemies and the money remains within the US economy, which are two of the reasons why I like it, beside the many practical prepping utilities.
Propane combustion is much cleaner than gasoline and other liquid hydrocarbons, though not quite as clean as natural gas combustion. Environmentally, it’s usually greener to cook with propane than with electricity. With a perfect burn, attainable only in theory, the only by-products are heat, carbon dioxide and water vapor. So, it can be used for indoor heating applications, but use a stove that provides a very high combustion efficiency and, especially, a low-oxygen sensor that will shut it down if the O2 gets low.
Convenience and Labor Savings
Another way to look at propane is as a serious labor saving device. In a self-subsistence scenario, your greatest critical shortages are going to be labor and the energy to power it. With propane in your resource inventory, the large amount of work that would normally have to be expended gathering and processing fuel for a cooking fire can then redirected into other critical tasks, such as growing food etc.
When cooking is less labor-intensive, it can also be assigned to the lessor-able in the party, such as older folks with more enthusiasm than physical stamina, while they simultaneously babysit and teach the young ones how to cook, freeing up the parents to work elsewhere.
The easiest way to implement propane into your prepping strategy and to start climbing the learning curve is to start looking for ways to incorporate it into your day-to-day life. It doesn’t much matter where you start, but probably the best place is cooking. So, if you don’t already have one, start shopping for a camping cook stove. Amazon has a good assortment  and you can often find propane stuff at very attractive prices at yard sales etc. Generally speaking, you want appliances that use those green 1 pound propane canisters that cost so much new, but that can also be easily refilled at a huge savings.
To develop your proficiency in advance, fire up the camping stove and cook at least a few meals with it, perhaps practicing your prepper cooking recipes at the same time. Maybe hold a “grid-down weekend” drill, where you live off nothing but assembled resources, in order to test your resources and quickly determine what’s missing. You’ll be killing at least three prepping proficiency birds with one stone: Propane, using your portable stove and subsistence-style cooking from stored food.
Propane on the Run
An empty bulk tanks weighs 19 pounds and, when full, will weigh 39 pounds. So, they’re not exactly ideal to bring along when running for your life on foot. However, if mobility is mandatory until you reach your safe haven (you do have one lined up, don’t you?), simple single-burner stoves can be quite small and compact.
When combined with wok cooking, which includes stir-fry, steaming and soups/stews etc., you can feed a feed a lot of people with very little fuel. Asian folks, where fuel is always in critical shortage, have been using woks to cook for countless years as the most fuel-efficient way to prepare food over a tiny flame.
For truly minimalist propane use, such as in your bug out bag, a good choice is the Coleman PefectFlow 1-Burner Stove that screws directly onto the top of the canister.
Between the stove and fuel canister, you’ll add about two pounds to your load. But, you’ll also be able to boil a lot of questionable water for drinking, instant soups, coffee etc. which will also help cut the chill, and heat some quick meals whenever you can stop running for a few minutes.
Adding a small Cantonese style hammered steel lightweight wok and a couple of utensils won’t add much more weight, and will give you even more subsistence options. The tiny stove and a canister will pack, mostly, inside the wok. Don’t forget to pre-season your new wok, as you would with cast iron.
Costs
All things considered, propane as a backup energy supply is dirt cheap. There’s a huge amount of high cost technology involved in the production of the gas and storage containers that you won’t be able to replace on a DIY level. Since propane is a byproduct of other processes, the market price doesn’t reflect its true cost to create it, as with, say, solar panels.
As for cost per heat unit, propane is cheaper (and a lot safer to use) than any of the liquid fuels, though not quite as cheap as piped-in natural gas, none of which will be available in a grid-down situation.
The market price range will generally fluctuate along with the rest of the hydrocarbon market, so stock up shortly after gasoline prices go down, after the propane dealer has had a chance to catch up to lower their prices, which they are frequently not in a hurry to do, unless prices are going up.
For the first couple of bulk tanks in the stockpile, at least, I wouldn’t stress too much about waiting for prices to drop to rock bottom. Even a 50 cents/gallon price difference is still only $2.50 for a bulk tank and I’d hate to get caught in the dark and cold because I delayed and tried to save a little pocket change. Once you’re basically prepared with a couple of bulk tanks, you can then start extending the time that you acquire the balance of your stockpile on a timely and cost-effective basis. Even one bulk tank, with sparing use, should keep you going comfortably for a month of grid-down.
Just to make things confusing, propane is sold in two different measurements: In pre-filled container form, it is sold by the pound of fuel. But it’s sold by the liquid gallon in bulk form. One gallon of liquid propane weighs just over four pounds, or will fill four green one pound canisters.
Since refilling, either by the dealer or the prepper, is never 100% to a container’s capacity, your results will likely vary a little from the measured theory, but this is close enough for long term planning,
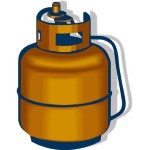
A brand new empty 20 pound (aka five gallon) bulk tank, the kind that your outdoor barbecue uses, will cost you about $25-$30. It must then be filled with 5 gallons of propane (currently $2.59/gallon at the farm co-op near my home in the Seattle area), which will cost another $12.95. So, the total cost for a brand new full bulk tank will run about $40.00.
propane3
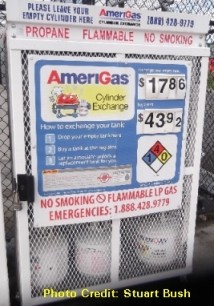
If you obtain your propane by trading in your tank for a pre-”filled” tank at the local store, it’s going to cost you about $18-$25. The higher price in the above recent photo at the local Wal-Mart is if you don’t have a trade-in tank. The lower price is if you do: A difference of about $26, or about the price for a brand new tank. Some propane kiosks will also charge a higher price if your trade-in tank is “non-OPD,” which we’ll cover a little later. You wan to avoid these like the plague.
But, the tank that you receive in trade won’t be full, because the suppliers deliberately do not fill it to capacity. To me, this is on a par with watering the booze. The shortage can vary from 2 pounds (10%) up to 5 pounds (25%) so, in order to figure out how badly you’re being ripped off, check the new tank’s label for the net weight in pounds and subtract that from 20. Around here, trade-in tanks are often 3 pounds (15%) light, so I’ll use that figure.
Trading in is a very costly way to buy propane, at least if that’s your only intent. On a trade-in basis, assuming a $20 trade-in price for the tank, each gallon of propane is going to cost you $ 4.71/gallon, which is a lot more than $2.59 in bulk, especially when you’re talking about five gallons per tank and multiple tanks in the stockpile. If the shortage is greater than 3 pound, you’re paying an even higher price for the fuel.
Propane prices, whether bulk or trade-in and besides market fluctuations, will also often vary by a great deal within the same region. It all depends on where you buy it. I have found that the cheapest place to buy bulk propane is at the local farm co-op. The most expensive is at gas stations near freeway interchanges that see a lot of RV traffic, where the price can be double the co-op’s price. For trade-ins, Wal-Mart has always been about 10% cheaper than other outlets, and that’s one reason to trade in your tanks there. So, shop around and find the best bulk prices in your area.
Another reason to not buy brand new tanks, if you’re going to be trading them in, is that you will lose that shiny new tank, getting a used one back. On a practical level, this doesn’t really matter. But, the idea of trading new for used still grates on me.
One Pound Canisters
A brand new 1 pound small green propane canister will run anywhere from about $2.50 to $7.50. $3.00 is about average locally, so I’ll use that figure. A gallon of propane in one pound canisters is going to cost you about $12.00. So, while this is certainly convenient, it’s also very expensive. Fortunately, these small canisters can be refilled many times for about 65 cents each and we’ll detail how to go about refilling later in this article.
Hardware
Something worth mentioning is to not confuse one pound propane cylinders and hardware with butane-powered ultra-light gear, which are primarily designed for backpacking. A tiny 4 ounce tank and stove might be great in your bug out bag, but this is not a good ongoing fuel source: The tiny tanks won’t last long, bulk butane is difficult to find in the best of times and there is no easy way to refill the tanks. The way that the tanks connect to the hardware is different than propane, too, so there’s no chance of mixing up the two.
One other caveat is that bulk propane tanks require a pressure-reducing regulator before you hook them up to most appliances. You can find these on gas barbecues and RV’s and they generally are very durable. On the other hand, the small one pound canisters do not require regulators and can be directly connected.
Yet another warning is to avoid tanks with rust in the metal, if at all possible. This rust weakens the strength of the tank wall and, if it gets bad enough, it will blow out from internal pressure, releasing all the gas in an explosive cloud, with no way to shut it off. For this reason, a brand new tank is supposed to be inspected and recertified 12 years after it was manufactured. After that, the tank is supposed to be recertified ever five years. As a practical matter, I have never had a bulk dealer check the certification date on any tank that I was having filled.
propane1 
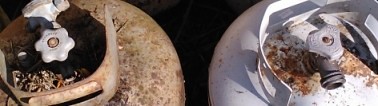
A few small scratches with a little rust is common and no big deal. But, if there’s serious rust, such as on the tanks in the above photo of my trade-in stockpile, you need to trade them in, whether they have the new style valve or not. The trade-in companies will clean, repaint and re-certify them, if possible.
But, if you’re keeping your tanks and plan to refill them with bulk gas, try to avoid scratching and dinging the paint as much as possible. If you really want to preserve them, add a can of white Rustoleum paint to your supplies, which is designed to go directly over rust, and touch up any scratches to protect the exposed steel from rusting further. If you store them outdoors in the weather, the tanks will eventually look like those in the above photo. So, the best place to store them is dry and out of the weather, but with plenty of ventilation. (Don’t just cover them up with a plastic tarp, which will concentrate condensation and be even worse than normal weathering.)
Finally, keep in mind that the threads into which you connect things to a bulk propane tank are *left handed.” That means that they need to be screwed in in the opposite direction as normal, counter-clockwise, instead of clockwise. In this case, “Lefty tighty, righty loosey.” This is especially important to remember when you’re disconnecting something from the tank valve: If you crank down hard in what would be the normal loosening direction, all you’re doing is making it tighter. If you’re strong enough, you’ll actually strip out the brass valve threads and that will destroy the tank for any further use, except trading it in, if the stores are even still open.
propane2
Thanks to a change some years back, bulk propane tank valves have been upgraded to what is known as OPD (Overfill Protection Device). This valve prevents over-filling the bulk and it also prevents gas from leaving the tank if the valve is opened, but nothing is hooked up to it.
You can easily see the difference between old-style valves and new-style in the above photo: The old-style, with a star-shaped knob, is on the left. The new-style OPD, with a triangular knob, is on the right. Replacing an old-style valve with a new-style valve on an old tank is not something that amateurs should do, except in an emergency.
By law, bulk propane dealers cannot refill tanks with old-style valves. But, they will happily refill trade-in tanks, even with the labels still on, which will save you $10.60 per five gallons over the trade-in cost. If you have 10 bulk tanks in your stockpile, refilling your own tanks creates a savings of $106, so it’s well worth the extra trouble.
In theory, your bulk propane dealer can top off the partially-filled trade-in tanks, but it would be a real imposition to ask them to go to the trouble for a gallon or so. If it’s a friend who would do you a favor anyway, that’s another thing, however. I wouldn’t feel too badly asking for a top-off of one recently acquired trade-in tank, if I was also having two empty tanks filled at the same time.
New-Style Tanks for Old
One of the really cool things about change, as much as most people hate it, is that this is where you find the best opportunities to save/make money. In this case, there is the opportunity to save a lot of money by obtaining empty old-style bulk propane tanks free or cheap and trading them in for “full” new-style tanks. For each old-style tank that you trade in, you’re going to save about $20, even factoring in the higher price of gas and the shortage. When you’re first setting up a stockpile of 10 tanks, that will reduce your total cost by $200, or about half the price of brand new, which will buy a lot of other prepping gear.
The reasons to go to Wal-Mart for your exchanges are 1. They’ll probably be the least expensive and, 2. The employees aren’t going to care what you’re trading in.
While the changeover happened more than 10 years ago, there are still lots of old-style tanks kicking around, of the countless millions that were produced. Since they can’t be refilled, they’re too light (18.5 lbs.) to be worth a trip to the local metal recycler and too heavy/bulky to throw in a garbage can, they tend to stick around, taking up space. A great place to find them is on the front of old RV trailers that haven’t moved in years.
In my experience, most people who are stuck with old-style tanks have been delighted to give them to me for free. So, look around and see what you can spot at friends and neighbors. I obtained many of my stockpile of tanks in the days when I was buying and selling vintage RV trailers. The unit may have had old-style tanks when it came in, but it didn’t when it sold.
Another good place to check for old-style tanks is local RV dealers who deal in a lot of trade-ins. They may just have a stockpile out back and be happy for you to haul them off.
If I really wanted to score a lot of trade-able tanks, I’d run an ad on Craigslist and offer to pay $5 each, delivered to my home. There are lots of amateur metal salvagers scrounging around, who work cheap, that the metal recycler would pay them less than $1 per tank. So, they would love to find a $5 buyer and you’ll probably have offers for more trade-in tanks than you need. Even paying $5 each, and not counting all the time and trouble you’d have to go through to obtain them for “free,” as well as the missing fuel in trade-in tanks, you’ll still be saving $14 per tank, over buying them brand new.
(At the same time, in the CL ad, I’d also be looking for 1 pound propane canisters and offer to pay up to $1 each for them. When you refill them the first time, your total cost will be $1.60, about half the price of new. Since the valves in these canisters are designed for a one-time use, though they will usually support many refills, they will eventually wear out. So, you want plenty of spares in your stockpile. I have about a dozen and want a couple of dozen more.)
Yet another place to look for old propane tanks is at your local metal recycler, who often sorts out re-sellable items from the general scrap and keeps them off to one side for customer purchase. The scrap yard near my house has a pile of about 50 used propane tanks and will be happy to sell them to me for 20 cents a pound, or about $3.80 each, which is still a huge savings over a new one for $25.
Part Two – Coming Up Next
This ends Part One of “Prepper Propane 101,” which mostly covered the what’s and why’s. In Part Two, we’ll get into the how’s and learn how to refill small green one pound canisters from bulk tanks, for a tiny fraction of the cost of new. This refilling can get a little complicated when you’re trying for a full fill, but it needn’t be if you understand what you’re doing. We’ll also go over some of the basic propane appliances that you should add to your resources.
THE FINAL WORD
It goes without saying that learning how to safely use propane is a good idea.  Campers, RV’ers, boaters and off-grid homesteaders are already familiar with propane but for many city dwellers, the gas BBQ represents the extent of their experience with propane gas.

Saturday, June 16, 2012

Dr. Peter Vincent Pry: America May Never Recover From EMP Attack

Mon, June 4, 2012
by: 
Ryan Mauro
Dr. Peter Vincent Pry is the Executive Director of the Task Force on National and Homeland Security for the Congressional Caucus on EMP (Electro-Magnetic Pulse) that endeavors to carry on the work of the EMP Commission. He is also the Director of the United States Nuclear Strategy Forum, an advisory body to Congress on policies to counter weapons of mass destruction.
Dr. Pry has served on the staffs of the EMP Commission, the Strategic Posture Commission, the Commission on the New Strategic Posture of the U.S., the House Armed Services Committee and the Central Intelligence Agency.
For those unfamiliar with what an EMP (Electro-Magnetic Pulse) attack is, please view the segment on the topic from the Clarion Fund’s Iranium by clicking here.
The following is RadicalIslam.org’s national security analyst Ryan Mauro’s interview with Dr. Pry:
Ryan Mauro: How long will it take to get critical infrastructure back up and running after an EMP attack?
Dr. Peter Vincent Pry:  Given the current state of U.S. unpreparedness, after a nuclear EMP attack that collapses the electric grid and other critical infrastructures, the U.S. might never recover.  The Congressional EMP Commission--that investigated the EMP threat for nearly a decade and produced the most definitive analysis of the threat--estimated that within one year of a nuclear EMP attack, about two-thirds of the U.S. population, about 200 million Americans, would likely perish from starvation, disease and societal collapse.  Iranian military writings openly describe making an EMP attack to eliminate the United States as an actor on the world stage.
Mauro: Have past nuclear tests in the air produced an EMP?
Pry: Past exoatmospheric nuclear tests have produced an EMP, such as the 1962 STARFISH PRIME nuclear test.  The nuclear burst must occur at high altitude, above 30-40 kilometers, to produce the EMP effect.  During the Cold War, the Soviet Union conducted high-altitude EMP tests over part of their own territory that collapsed electric grids.  Fifty years of empirical data from nuclear tests and EMP simulators proves that an EMP attack would have catastrophic consequences.
Mauro: How could the U.S. government protect us from this threat? How much would it cost?
Pry:  The Congressional EMP Commission produced a plan for protecting all U.S. critical infrastructures from nuclear and natural EMP (such as would be generated by a great geomagnetic storm, like the 1859 Carrington event) that could be implemented in 3-5 years at a cost of $10-20 billion.  This would provide robust protection.  At minimum, the 300 EHV transformers that service the biggest U.S. cities, where most of the population lives, could and should be protected, at a cost of $100-200 million, or about one dollar for every life that could be saved.  The Federal Energy Regulatory Commission estimates that the national electric grid could be protected from EMP at a cost to the average rate payer of 20 cents annually.
Mauro: How much dispute is there over the science behind the horrific scenario you depict? A skeptic once sent me a report by Oak Ridge National Laboratories/Metatech about “myths” regarding the EMP threat.
 Pry: Among the numerous official Congressional and USG studies on nuclear EMP attack--that includes reports by the Congressional EMP Commission, the Congressional Strategic Posture Commission, the Department of Energy and National Electric Reliability Corporation and the Federal Energy Regulatory Commission (which includes the Metatech report), there is an official scientific and technical consensus that an EMP attack would have catastrophic consequences.  Even the most optimistic "best case" scenario involving a nuclear EMP attack by a primitive low-yield nuclear weapon would be an unprecedented catastrophe and could collapse the national electric grid and other critical infrastructures that sustain modern society and the lives of millions.
 Indeed, the entire purpose of Congressional Commissions is to, if possible, resolve controversy and achieve consensus on matters of national security concern.  Two Congressional Commissions staffed by our nation's best experts and supported by the vast resources of the defense department, the intelligence community and the national nuclear weapons laboratories have independently arrived at the same consensus that a nuclear EMP attack would be catastrophic--so as a matter of public policy, the existential character of the nuclear EMP threat is not controversial, but an established fact.
There are some individuals, usually in academia, who claim the EMP threat is exaggerated.  But these people are not EMP experts and are simply ignorant or politically motivated, as when the New York Times ganged up on Newt Gingrich for trying to warn about the EMP threat during his presidential bid.  Nonetheless the press, uneducated about EMP itself, keeps quoting these non-experts.
Nothing could be further from the truth.  I know well Dr. William Radasky, the team leader of the Oak Ridge/Metatech report, and he would certainly agree that a nuclear EMP attack on the U.S. would be an unprecedented catastrophe--and this is the conclusion of his report.  If you read the report, it warns that an EMP event could collapse the electric grid and other critical infrastructures and require 4-10 years to recover.  Can you imagine trying to survive for years in the aftermath of a nuclear EMP attack that deprives you and millions of your fellow citizens of food, water, transportation and other necessities for life?  Sounds pretty catastrophic to me.
But it should not take a genius to realize that when a falling tree branch can cause the great northeast blackout of 2003, any nuclear EMP attack would certainly have catastrophic consequences.  Iran, North Korea, China and Russia all certainly understand this, as reflected in their military writings.
Ryan Mauro: How far away is Iran and other enemies of the U.S. from having the capability to carry out this kind of attack? Some experts say that Iran would still need a year to construct an actual nuclear bomb after acquiring the necessary highly enriched uranium and would need years after that to develop a nuclear warhead that can fit onto a ballistic missile.
Dr. Peter Vincent Pry:  Any state or group possessing any nuclear weapon and any missile capable of reaching an altitude over 30-40 kilometers can make an EMP attack.  An ICBM is not necessary.  An EMP attack can be delivered by a short-range missile launched from a ship, such as a commercial freighter, operating near U.S. shores.  Iran has practiced such a delivery mode.  Iran already has missiles, such as Scuds and its Shahab-III, capable of delivering a nuclear warhead.
Officially, the Obama Administration claims that Iran does not yet have nuclear weapons.  Personally, I have written several articles warning that Iran might already have the bomb.  Our intelligence on Iran's nuclear weapons program is not good.  Historically, our intelligence community has a bad record on predicting the advent of new nuclear weapon states and was taken by surprise by the development of nuclear weapons by Russia, India, Pakistan and North Korea.
Supposedly, Iran has been trying to develop nuclear weapons for 20 years, yet during World War II, the U.S. Manhattan Project developed the world's first nuclear weapons using 1940’s era technology in just three years.  Why should Iran, with access to the now declassified Manhattan Project papers and copious other U.S. documents on nuclear weapons design and helped by North Korea and others and equipped with modern technology, not be able to accomplish in 20 years what the U.S. accomplished during the 1940’s in just three?  
The difficulty of miniaturizing a nuclear warhead for missile delivery is often exaggerated.  Pakistan deployed nuclear warheads on its Ghauri missile just one year after its first nuclear test.  Israel, according to the respected Wisconsin Project, has developed a sophisticated array of nuclear weapons, including thermonuclear warheads and weapons miniaturized for delivery by missiles and artillery--all without nuclear testing.

Ryan Mauro is RadicalIslam.org's National Security Analyst and a fellow with the Clarion Fund. He is the founder of WorldThreats.com and is frequently interviewed on Fox News.

Saturday, November 5, 2011

Micro Hydro Power.....a Great Idea.

The Stream Engine and LH1000 are designed for use in battery-based power systems, with electricity generated at a steady rate, and stored in batteries for later use at higher rates than is generated. During times of low demand power is stored. An inverter is used when AC power is desired.
Water from a stream is channelled into a pipeline to gain enough head (the vertical distance the water falls) to power the system. The Stream Engine operates at heads of about
2 metres (6 feet) and upward. The water passes through a nozzle, where it accelerates, strikes the turbine wheel, and turns the generator shaft. Up to 4 nozzles can be installed on one machine.

The LH1000 operates at heads up to 3 metres (10 feet). The water passes through a guide vane assembly and then turns the propeller which is connected to the generator, then exits through a draft tube which is a tapered pipe which is immersed in the tailwater.

The PM Field Alternator

The ES & D alternator uses sixteen strong magnets embedded in a top plate which is spun by the runner. The twelve stator windings are stationary. Electricity is generated by passing the spinning magnets over the stator windings. The output is determined by the right mixture of rpm, configuration of the stator windings, and the distance between the magnetic field and the stator.

The field to stator distance is adjusted by a bolt within a bolt arrangement, which lowers or raises the spinning magnets. The stator windings can be configured into parallel, series, Delta or Wye wiring. The windings terminate on three studs for easy reconfiguration. The studs are before the rectifier, so it’s easy to take the output as a higher voltage three phase ac for long transmission lines.

This may be a little confusing, but we will provide the machine with the right configuration for your site. The beauty of this alternator is in its high efficiency and lack of moving parts. Since no electricity is required to energize the field, every watt generated goes towards output. The three ball type #6203 bearings supporting the shaft should last for years. They should be available from all bearing distributors. The machine can be disassembled for bearing replacement in about 15 minutes on a workbench. A bearing press and properly sized mandrel are suggested for removing and replacing the bearings. Any machine shop can do this very quickly.

Typically, these systems operate at 12, 24, or 48 volts, with re-connectable wiring which allows the user to install a standard turbine at most sites.

Custom windings are also available which can produce high voltage (120, 240) at any site. contact us

Friday, September 30, 2011

I push self sufficiency, self reliance, or what every else you want to call it! In fact, I'm kind of a nag about it. I was going through my old magazines and found a 2007 issue of Mother Earth News and an article by Craig Idlebrook. He has 75 way to live on less. He just doesn't tell a story, he actually practices what he preaches. I'm not going to share them all at once, because I want us all to think on a little bit at a time and not get overwhelmed. And, by the way, I am now a subscriber to this wonderful magazine! ~Karin


Self Sufficiency
Part 4

How To Keep Upkeep Costs Down
  1. Close off unused rooms to save on heat and air conditioning. (Since the kids moved out, we basically cut off the basement for heat. I only open vents when we have guests.)
  2. Be efficient with your appliances. Have a big baking night when you're going to use the oven. Let your woodstove also be your dryer and water heater.
  3. Take advantage of natural weather patterns to heat and cool your house. In the summer, open the windows at night and close them again by noon. (I grew up 6 blocks from the ocean. When it was hot we opened the windows and let the breeze blow through, when it was cold we shut the windows and put on a sweater.)
  4. Place your refrigerator in the coldest part of the house so it requires less energy to keep the temperture low.
  5. Wash your clothes in cold water. It's the friction that does most of the cleaning, not the heat.
  6. Switch off your water heater when you're not going to use it for extended periods of time.
  7. Buy energy-efficient light bulbs. The savings on your electric bills add up fast. (Okay, I did this. I bought the kinds that's good for 10 years. Crock! They still only last 2 or 3 years. I think its a scam.)
  8. Unplug any unused electric items with lights, clocks or timers. They use an amazing amount of power just sitting there. You can plug multiple items into one power strip to make shutting them all off faster. (My brother powered his home with solar panels and he used power strips. My home has so many lights on you can walk through the house at night and see where you're going. I can't convince my husband that we'd save money. Hmm, maybe I'll conduct an experiment and turn everything off for one month and we'll see how much we save on our power bill. I'll report back.)
 

Saturday, July 16, 2011

Solar Cookers for TEOTWAWKI

Dr. Jones and I have spoken a few times. I found him to be an amazingly kind and gentle man.  Soft spoken and truly concerned about others more than himself.  He is a man of honor, and even after the persecution he has experienced for his stand on 911 his without guile.  It has been a privilege for me to have associated with him.

Many of you know him for his work in disputation of the 911 tragedy, and his work in "Cold Fusion".  Few know of his work with Solar Cookers, and Solar Coolers: Yes I did say Solar Coolers.  It is amazingly simple, and downright cheep to make one of his solar oven designs.....so if you would like to pay $200 - $300 bucks to purchase a less effective cooker, go ahead.  I would rather pay a couple of dollars, and have a more efficient product.  But then again...that's just crazy me.....

Read on....


Solar Cookers and Other Cooking Alternatives
Sarah McGuire and Prof. Steven E. Jones
Department of Physics and Astronomy and BYU REU Program
Brigham Young University, Provo, Utah USA 84602
The Solar Funnel Cooker
How to Make and Use The BYU Solar Cooker/Cooler
by Steven E. Jones, Professor of Physics at Brigham Young University (BYU), with Colter Paulson, Jason Chesley, Jacob Fugal, Derek Hullinger, Jamie Winterton, Jeannette Lawler, and Seth, David, Nathan, and Danelle Jones.
Finished Cooker
Introduction
A few years ago, I woke up to the fact that half of the world’s peoples must burn wood or dried dung in order to cook their food. It came as quite a shock to me, especially as I learned of the illnesses caused by breathing smoke day in and day out, and the environmental impacts of deforestation -not to mention the time spent by people (mostly women) gathering sticks and dung to cook their food. And yet, many of these billions of people live near the equator, where sunshine is abundant and free. Ergo…
As a University Professor of Physics with a background in energy usage, I set out to develop a means of cooking food and sterilizing water using the free energy of the sun. First, I looked at existing methods.
The parabolic cooker involves a reflective dish that concentrates sunlight to a point where the food is cooked. This approach is very dangerous since the sun’s energy is focused to a point which is very hot, but which cannot be seen. (BYU students and I built one which will set paper on fire in about 3 seconds!) I learned that an altruistic group had offered reflecting parabolas to the people living at the Altiplano in Bolivia. But more than once the parabolas had been stored next to a shed — and the passing sun set the sheds on fire! The people did not want these dangerous, expensive devices, even though the Altiplano region has been stripped of fuel wood.
The box cooker: Basically an insulated box with a glass or plastic lid, often with a reflecting lid to reflect sunlight into the box. Light enters through the top glass (or plastic), to slowly heat up the box. Problems: energy enters only through the top, while heat is escaping through all the other sides, which have a tendency to draw heat away from the food. When the box is opened to put food in or take it out, some of the heat escapes and is lost. Also, effective box cookers tend to be more complicated to build than the funnel cooker.
While studying this problem, I thought again and again of the great need for a safe, inexpensive yet effective solar cooker. It finally came to me at Christmastime a few years ago, a sort of hybrid between the parabola and a box cooker. It looks like a large, deep funnel, and incorporates what I believe are the best features of the parabolic cooker and the box cooker.
The first reflector was made at my home out of aluminum foil glued onto cardboard, then this was curved to form a reflective funnel. My children and I figured out a way to make a large card-board funnel easily. (I’ll tell you exactly how to do this later on.)
The Solar Funnel Cooker is safe and low cost, easy to make, yet very effective in capturing the sun’s energy for cooking and pasteurizing water -> Eureka!
Later, I did extensive tests with students (including reflectivity tests) and found that aluminized Mylar was good too, but relatively expensive and rather hard to come by in large sheets. Besides, cardboard is found throughout the world and is inexpensive, and aluminum foil is also easy to come by. And individuals can make their own solar cookers easily, or start a cottage-industry to manufacture them for others.
Prototypes of the Solar Funnel Cooker were tested in Bolivia, and outperformed an expensive solar box cooker and a “Solar Cookit” – while costing much less. Brigham Young University submitted a patent application, mainly to insure that no company would prevent wide distribution of the Solar Funnel Cooker. BYU makes no profit from the invention. ( I later learned that a few people had had a similar idea, but with methods differing from those developed and shown here.) So now I’m trying to get the word out so that the invention can be used to capture the free energy of the sun – for camping and for emergencies, yes, but also for every day cooking where electricity is not available and even fuel wood is getting scarce.
How it Works
The reflector is shaped like a giant funnel, and lined with aluminum foil. (Easy to follow instructions will be given soon.) This funnel is rather like the parabolic cooker, except that the sunlight is concentrated along a line (not a point) at the bottom of the funnel. You can put your hand up the bottom of the funnel and feel the sun’s heat, but it will not burn you.
Next, we paint a jar black on the outside, to collect heat, and place this at the bottom of the funnel. Or one can use a black pot, with a lid. The black vessel gets hot, fast. But not quite hot enough to cook with… We need some way to build up the heat without letting the air cool it. So, I put a cheap plastic bag around the jar — voila, the solar funnel cooker was born! The plastic bag, available in grocery stores as a “poultry bag”, replaces the cumbersome and expensive box and glass lid of the solar box ovens. You can use the plastic bags used in American stores to put groceries in, as long as they let a lot of sunlight pass. (Dark- colored bags will not do.)
I recently tested a bag used for fruits and vegetables, nearly transparent and available free at American grocery stores, that works great. This is stamped “HDPE” for high-density polyethylene on the bag (ordinary polyethylene melts too easily). A block of wood is placed under the jar to help hold the heat in. (Any insulator, such as a hot pad or rope or even sticks, will also work.)
A friend of mine who is also a Physics Professor did not believe I could actually boil water with the thing. So I showed him that with this new “solar funnel cooker,” I was able to boil water in Utah in the middle of winter! I laid the funnel on its side since it was winter and pointed a large funnel towards the sun to the south. I also had to suspend the black cooking vessel — rather than placing it on a wooden block. This allows the weaker sun rays to strike the entire surface of the vessel.
Of course, the Solar Funnel works much better outside of winter days (when the UV index is 7 or greater). Most other solar cookers will not cook in the winter in northern areas (or south of about 35 degrees, either).
I thought that a pressure cooker would be great. But the prices in stores were way too high for me. Wait, how about a canning jar? These little beauties are designed to relieve pressure through the lid — a nice pressure cooker. And cooking time is cut in half for each 10º C we raise the temperature (Professor Lee Hansen, private communication). I used one of my wife’s wide-mouth canning jars, spray-painted (flat) black on the outside, and it worked great. Food cooks faster when you use a simple canning jar as a pressure cooker. However, you can also put a black pot in the plastic bag instead if you want. But don’t use a sealed container with no pressure release like a mayonnaise jar — it can break as the steam builds up! (I’ve done it.)
How to Build Your Own Solar Funnel Cooker
What You will Need for the Funnel Cooker:
A piece of flat cardboard, about 2 feet wide by 4 feet long. (The length should be just twice the width. The bigger, the better.)
Ordinary aluminum foil.
A glue such as white glue (like Elmer’s glue), and water to mix with it 50-50. Also, a brush to apply the glue to the cardboard (or a cloth or paper towel will do). Or, some may wish to use a cheap “spray adhesive” available in spray cans. You can also use wheat paste.
Three wire brads– or small nuts and bolts, or string to hold the funnel together.
For a cooking vessel, I recommend a canning jar (“Ball” wide-mouth quart jars work fine for me; the rubber ring on the lid is less likely to melt than for other jars I’ve found. A two-quart canning jar is available and works fine for larger quantities of food, although the cooking is somewhat slower.).
The cooking jar (or vessel) should be spray-painted black on the outside. I find that a cheap flat-black spray paint works just fine. Scrape off a vertical stripe so that you have a clear glass “window” to look into the vessel, to check the food or water for boiling.
A block of wood is used as an insulator under the jar. I use a piece of 2″X4″ board which is cut into a square nominally 4″ x 4″ by about 2″ thick. (10cm square x 5cm thick.) One square piece of wood makes a great insulator.
A plastic bag is used to go around the cooking-jar and block of wood, to provide a green-house effect. Suggestions:
Reynolds™ Oven Bag, Regular Size works great: transparent and won’t melt. (Cost about 25 cents each in U.S. grocery stores.)
Any nearly-transparent HDPE bag (High-density Polyethylene). Look for “HDPE” stamped on the bag. I’ve tested HDPE bags which I picked up for free at my grocery store, used for holding vegetables and fruits. These are thin, but very inexpensive. Tested side-by-side with an oven bag in two solar funnels, the HDPE bag worked just as well! (Caution: we have found that some HDPE bags will melt should they contact the hot cooking vessel. For this reason, we recommend using the oven-safe plastic bag wherever possible.)
An idea attributed to Roger Bernard and applied now to the BYU Funnel Cooker: place a pot (having a blackened bottom and sides) in a glass bowl, and cover with a lid. Try for a tight fit around the bottom to keep hot air trapped inside.

Pyrex Pan
The metal pot or bowl should be supported around the rim only, with an air space all around the bottom (where the sunlight strikes it). Put a blackened lid on top of the pot. Then simply place this pot-in-bowl down in the bottom of the funnel – no plastic bag is needed! This clever method also allows the cook to simply remove the lid to check the food and to stir. I like this idea – it makes the solar cooker a lot like cooking over a fire. See Photographs for further details.
Construction Steps
Cut a Half-circle out of the Cardboard

Circle Cut
Cut a half circle out of the cardboard, along the bottom as shown below. When the funnel is formed, this becomes a full-circle and should be wide enough to go around your cooking pot. So for a 7″ diameter cooking pot, the radius of the half-circle is 7″. For a quart canning jar such as I use, I cut a 5″ radius half-circle out of the cardboard.
Form the Funnel
To form the funnel, you will bring side A towards side B, as shown in the figure. The aluminum foil must go on the INSIDE of the funnel. Do this slowly, helping the cardboard to the shape of a funnel by using one hand to form creases that radiate out from the half-circle. Work your way around the funnel, bending it in stages to form the funnel shape, until the two sides overlap and the half-circle forms a complete circle. The aluminum foil will go on the INSIDE of funnel. Open the funnel and lay it flat, “inside up”, in preparation for the next step.

Form the Funnel
Glue Foil to Cardboard
Apply glue or adhesive to the top (inner) surface of the cardboard, then quickly apply the aluminum foil on top of the glue, to affix the foil to the cardboard. Make sure the shiniest side of the foil is on top, since this becomes your reflective surface in the Funnel. I like to put just enough glue for one width of foil, so that the glue stays moist while the foil is applied. I also overlap strips of foil by about 1″ ( or 2 cm). Try to smooth out the aluminum foil as much as you reasonably can, but small wrinkles won’t make much difference. (If even cardboard is not available, one can simply dig a funnel-shaped hole in the ground and line it with a reflector, to make a fixed solar cooker for use at mid-day.)
Join side A to side B to keep the funnel together.
The easiest way to do this is to punch three holes in the cardboard that line up on side A and side B (see figure). Then put a metal brad through each hole and fasten by pulling apart the metal tines. Or you can use a nut-and-bolt to secure the two sides (A & B) together.
Be creative here with what you have available. For example, by putting two holes about a thumb-width apart, you can put a string, twine, small rope, wire or twist-tie in one hole and out the other, and tie together.

Secure End
When A and B are connected together, you will have a “funnel with two wings”. The wings could be cut off, but these help to gather more sunlight, so I leave them on.
Tape or glue a piece of aluminum foil across the hole at the bottom of the funnel, with shiny side in.
This completes assembly of your solar funnel cooker.
For stability, place the Funnel inside a cardboard or other box to provide support. For long-term applications, one may wish to dig a hole in the ground to hold the Funnel against strong winds.
Final Steps
At this stage, you are ready to put food items or water into the cooking vessel or jar, and put the lid on securely. (See instructions on food cooking times, to follow.)
Place a wooden block in the INSIDE bottom of the cooking bag. I use a piece of 2X4 board which is cut into a square nominally 4″X4″ by about 2″ thick. Then place the cooking vessel containing the food or water on top of the wooden block, inside the bag.
Next, gather the top of the bag in your fingers and blow air into the bag, to inflate it. This will form a small “greenhouse” around the cooking vessel, to trap much of the heat inside. Close off the bag with a tight twist tie or wire. Important: the bag should not touch the sides or lid of the cooking vessel. The bag may be called a “convection shield,” slowing convection-cooling due to air currents.
Place the entire bag and its contents inside the funnel near the bottom as shown in the Photographs.
Place the Solar Funnel Cooker so that it Faces the Sun
Remember: Sunlight can hurt the eyes: Please wear sunglasses when using a Solar Cooker! The Funnel Cooker is designed so that the hot region is deep down inside the funnel, out of harm’s way.
Put the Solar Funnel Cooker in the sun pointing towards the sun, so that it captures as much sunlight as possible. The design of the funnel allows it to collect solar energy for about an hour without needing to be re-positioned. For longer cooking times, readjust the position of the funnel to follow the sun’s path.
It helps to put the Solar Funnel Cooker in front of a south-facing wall or window (in the Northern Hemisphere) to reflect additional sunlight into the funnel. A reflective wall is most important in locations farther from the equator and in winter. In the Southern Hemisphere, put the Solar Funnel Cooker in front of a North-facing wall or window to reflect additional sunlight into your cooker.
After Cooking
Remember that the cooking vessel will be very hot: Use cooking pads or gloves when handling! If you are heating water in a canning jar, you may notice that the water is boiling when the lid is first removed – it gets very hot!
Open the plastic cooking bag by removing the twist-tie. Using gloves or a thick cloth, lift the vessel out of the bag and place it on the ground or table. Carefully open the vessel and check the food, to make sure it has finished cooking. Let the hot food cool before eating.
Helpful Hints
Avoid leaving fingerprints and smudges on the inside surface of the cooker. Keep the inner surface clean and shiny by wiping occasionally with a wet towel. This will keep the Solar Funnel Cooker working at its best.
If your funnel gets out-of-round, it can be put back into a circular shape by attaching a rope or string between opposite sides which need to be brought closer together.
For long-term applications, a hole in the ground will hold the Funnel Cooker securely against winds. Bring the funnel inside or cover it during rain storms.
The lids can be used over and over. We have had some trouble with the rubber on some new canning-jar lids becoming soft and “sticky.” “Ball canning lids” do not usually have this problem. Running new lids through very hot water before the first use seems to help. The lids can be used over and over if they are not bent too badly when opened (pry off lid carefully).
The jar can be suspended near the bottom of the funnel using fishing line or string (etc.), instead of placing the jar on a block of wood. A plastic bag is placed around the jar with air puffed inside, as usual, to trap the heat. The suspension method allows sunlight to strike all surfaces of the jar, all around, so that heats faster and more evenly. This suspension method is crucial for use in winter months.
Adjust the funnel to put as much sunlight onto the cooking jar as possible. Look at the jar to check where the sunlight is hitting, and to be sure the bottom is not in the shadows. For long cooking times (over about an hour), readjust the position of the funnel to follow the sun’s path. During winter months, when the sun is low on the horizon (e.g., in North America), it is helpful to lay the funnel on its side, facing the sun.
Tests in Utah
I have personally used the Solar Funnel Cooker to cook lunches over many weeks. My favorite foods to cook are potatoes (cut into logs or slices) and carrot slices. Vegetables cook slowly in their own juices and taste delicious. I also make rice, melted cheese sandwiches, and even bread in the Solar Funnel Cooker. I usually put the food out around 11:30 and let it cook until 12:45 or 1 pm, just to be sure that it has time to cook. I’ve never had any food burn in this cooker.
I have also cooked food in the mountains, at an altitude of around 8,300 feet. If anything, the food cooked faster there – the sunlight filters through less atmosphere at high altitudes.
I find that people are surprised that the sun alone can actually cook food. And they are further pleasantly surprised at the rich flavors in the foods which cook slowly in the sun. This inexpensive device does it!
Students at Brigham Young University have performed numerous tests on the Solar Funnel Cooker along with other cookers. We have consistently found much faster cooking using the Solar Funnel Cooker. The efficiency/cost ratio is higher than any other solar cooking device we have found to date. Mr. Hullinger also performed studies of transmissivity, reflectivity and absorptivity of alternate materials which could be used in the Solar Funnel Cooker. While there are better materials (such as solar-selective absorbers), our goal has been to keep the cost of the Solar Cooker as low as possible, while maintaining safety as a first priority.
Tests in BoliviaFinished Cooker
The BYU Benson Institute organized tests between the Solar Funnel Cooker and the “old-fashioned” solar box oven. The solar box oven cost about $70 and was made mostly of cardboard. It took nearly two hours just to reach water pasteurization temperature. The Bolivian report notes that “food gets cold every time the pots are taken from and into the oven.” The solar box oven failed even to cook boiled eggs. (More expensive box cookers would hopefully work better.)
An aluminized-mylar Solar Funnel Cooker was also tested in Bolivia, during the Bolivian winter. Water pasteurization temperature was reached in 50 minutes, boiled eggs cooked in 70 minutes, and rice cooked in 75 minutes. The Bolivian people were pleased by the performance. So were we! (La Paz, Bolivia, August, 1996)
I also donated two dozen solar funnel cookers for people in Guatemala. These were taken there by a group of doctors going there for humanitarian service. The people there also liked the idea of cooking with the sun’s free energy! For an aluminized-Mylar Solar Funnel Cooker kit, please contact CRM (licensed manufacturer) at +1 (801) 292-9210.
Water and Milk Pasteurization
Contaminated drinking water or milk kills thousands of people each day, especially children. WHO reports that 80% of illnesses in the world are spread through contaminated water. Studies show that heating water to about 65º – 70º C (150º F) is sufficient to kill coliform bacteria, rotaviruses, enteroviruses and even Giardia. This is called pasteurization.
Pasteurization depends on how hot and how long water is heated. But how do you know if the water got hot enough? You could use a thermometer, but this would add to the cost, of course. When steam leaves the canning jar (with lid on tight) and forms “dew” on the inside of the cooking bag, then the water is probably pasteurized to drink. (The goal is to heat to 160º Fahrenheit for at least six minutes.) With a stripe of black paint scraped off the jar, one can look through the bag and into the jar and see when the water is boiling – then it is safe for sure.
Think of all the lives that can be saved simply by pasteurizing water using a simple Solar Cooker! (See also Recent Advances in Solar Water Pasteurization)
Safety
Safety was my first concern in designing the Solar Funnel Cooker, then came low cost and effectiveness. But any time you have heat you need to take some precautions.
The cooking vessel (jar) is going to get hot, else the food inside won’t cook. Let the jar cool a bit before opening. Handle only with gloves or tongs.
Always wear dark glasses to protect from the sun’s rays. We naturally squint, but sunglasses are important.
Keep the plastic bag away from children and away from nose and mouth to avoid any possibility of suffocation.
Cooking with the Solar Funnel Cooker
What do you cook in a crock pot or moderate-temperature oven? The same foods will cook about the same in the Solar Funnel Cooker — without burning. The charts below give approximate summer cooking times.
The solar cooker works best when the UV index is 7 or higher. (Sun high overhead, few clouds.)
Cooking times are approximate. Increase cooking times for partly-cloudy days, sun not overhead (e.g., wintertime) or for more than about 3 cups of food in the cooking jar.
Stirring is not necessary for most foods. Food generally will not burn in the solar cooker.
Vegetables (Potatoes, carrots, squash, beets, asparagus, etc.)
Preparation: No need to add water if fresh. Cut into slices or “logs” to ensure uniform cooking. Corn will cook fine with or without the cob.
Cooking Time: About 1.5 hours
Cereals and Grains (Rice, wheat, barley, oats, millet, etc.)
Preparation: Mix 2 parts water to every 1 part grain. Amount may vary according to individual taste. Let soak for a few hours for faster cooking. To ensure uniform cooking, shake jar after 50 minutes. CAUTION: Jar will be hot. Use gloves or cooking pads.
Cooking Time: 1.5-2 hours
Pasta and Dehydrated Soups
Preparation: First heat water to near boiling (50-70 minutes). Then add the pasta or soup mix. Stir or shake, and cook 15 additional minutes.
Cooking Time: 65-85 minutes
Beans
Preparation: Let tough or dry beans soak overnight. Place in cooking jar with water.
Cooking Time: 2-3 hours
Eggs
Preparation: No need to add water. Note: If cooked too long, egg whites may darken, but taste remains the same.
Cooking Time: 1-1.5 hours, depending on desired yolk firmness.
Meats (Chicken, beef, and fish)
Preparation: No need to add water. Longer cooking makes the meat more tender.
Cooking Time: Chicken: 1.5 hours cut up or 2.5 hours whole; Beef: 1.5 hours cut up or 2.5-3 hours for larger cuts; Fish: 1-1.5 hours
Baking
Preparation: Times vary based on amount of dough.
Cooking Times: Breads: 1-1.5 hours; Biscuits: 1-1.5 hours; Cookies: 1 hour
Roasted Nuts (Peanuts, almonds, pumpkin seed, etc.)
Preparation: Place in jar. A little vegetable oil may be added if desired.
Cooking Time: About 1.5 hours
MRE’s and prepackaged foods
Preparation: For foods in dark containers, simply place the container in the cooking bag in place of the black cooking jar.
Cooking Times: Cooking time varies with the amount of food and darkness of package.
——————————————————————————–
How to Use the Solar Funnel as a Refrigerator/Cooler
A university student (Jamie Winterton) and I were the first to demonstrate that the BYU Solar Funnel Cooker can be used – at night – as a refrigerator. Here is how this is done.
The Solar Funnel Cooker is set-up just as you would during sun-light hours, with two exceptions:
1. The funnel is directed at the dark night sky. It should not “see” any buildings or even trees. (The thermal radiation from walls, trees, or even clouds will diminish the cooling effect.).
2. It helps to place 2 (two) bags around the jar instead of just one, with air spaces between the bags and between the inner bag and the jar. HDPE and ordinary polyethylene bags work well, since polyethylene is nearly transparent to infrared radiation, allowing it to escape into the “heat sink” of the dark sky.
During the day, the sun’s rays are reflected onto the cooking vessel which becomes hot quickly. At night, heat from the vessel is radiated outward, towards empty space, which is very cold indeed (a “heat sink”).
As a result, the cooking vessel now becomes a small refrigerator. We routinely achieve cooling of about 20º F (10º C) below ambient air temperature using this remarkably simple scheme.
In September 1999, we placed two funnels out in the evening, with double-bagged jars inside. One jar was on a block of wood and the other was suspended in the funnel using fishing line. The temperature that evening (in Provo, Utah) was 78º F. Using a Radio Shack indoor/outdoor thermometer, a BYU student (Colter Paulson) measured the temperature inside the funnel and outside in the open air. He found that the temperature of the air inside the funnel dropped quickly by about 15 degrees, as its heat was radiated upwards in the clear sky. That night, the minimum outdoor air temperature measured was 47.5 degrees – but the water in both jars had ICE. I invite others to try this, and please let me know if you get ice at 55 or even 60 degrees outside air temperature (minimum at night). A black PVC container may work even better than a black-painted jar, since PVC is a good infrared radiator – these matters are still being studied.
I would like to see the “Funnel Refrigerator” tried in desert climates, especially where freezing temperatures are rarely reached. It should be possible in this way to cheaply make ice for Hutus in Rwanda and for aborigines in Australia, without using any electricity or other modern “tricks.” We are in effect bringing some of the cold of space to a little corner on earth. Please let me know how this works for you.
Conclusion: Why We Need Solar Cookers
The BYU Funnel Cooker/Cooler can:
Cook food without the need for electricity or wood or petroleum or other fuels.
Pasteurize water for safe drinking, preventing many diseases.
Save trees and other resources.
Avoid air pollution and breathing smoke while cooking.
Use the sun’s free energy. A renewable energy source.
Cook food with little or no stirring, without burning.
Kill insects in grains.
Dehydrate fruits, etc.
Serve as a refrigerator at night, to cool even freeze water.
(Try that without electricity or fuels! See also Balancing the Scales.)
The burden for gathering the fuel wood and cooking falls mainly on women and children. Joseph Kiai reports from Dadaab, Kenya: “Women who can’t afford to buy wood start at 4 am to go collecting and return about noon… They do this twice a week to get fuel for cooking… The rapes are averaging one per week.” From Belize: “Many times the women have to go into the forest dragging their small children when they go to look for wood. It is a special hardship for pregnant and nursing mothers to chop and drag trees back to the village… they are exposed to venomous snakes and clouds of mosquitoes.” (Anna K.) (Quoted in newsletters by Solar Cookers International.)
And the forests are dwindling in many areas. Edwin Dobbs noted in Audubon Magazine, Nov. 1992, “The world can choose sunlight or further deforestation, solar cooking or widespread starvation…”
Americans should be prepared for emergencies, incident to power failures. A Mormon pioneer noted in her journal: “We were now following in their trail traveling up the Platte River. Timber was sometimes very scarce and hard to get. We managed to do our cooking with what little we could gather up…” (Eliza R. Snow) Now there’s someone who needed a light-weight Solar Cooker!
Here’s another reason to use a solar cooker. Many people in developing countries look to see what’s being done in America. I’m told that if Americans are using something, then they will want to try it, too. The more people there are cooking with the sun, the more others will want to join in. A good way to spread this technology is to encourage small local industries or families to make these simple yet reliable solar cookers for others at low cost. I’ve used this cooker for three summers and I enjoy it. Cooking and making ice with the funnel cooker/cooler will permit a significant change in lifestyle. If you think about it, this could help a lot of people. The BYU Solar Funnel Cooker uses the glorious sunshine — and the energy of the sun is a free gift from God for all to use!
——————————————————————————–
Answers to commonly-asked questions
Will the cooker work in winter (in the United States)?
As the sun moves closer to the southern horizon in the winter, the solar cooker is naturally less effective. A good measure of the solar intensity is the “UV index” which is often reported with the weather. When the ultraviolet or UV index is 7 or above– common in summer months– the solar cooker works very well. In Salt Lake City in October, the UV index was reported to be 3.5 on a sunny day. We were able to boil water in the Solar Funnel Cooker during this time, but we had to suspend the black jar in the funnel so that sunlight struck all sides. (We ran a fishing line under the screw-on lid, and looped the fishing line over a rod above the funnel. As usual, a plastic bag was placed around the jar, and this was closed at the top to let the fishing line out for suspending the jar.)
The solar “minimum” for the northern hemisphere occurs on winter solstice, about December 21st each year. The solar “maximum” occurs six months later, June 21st. Solar cooking works best from about March 20 – October 1 in the north. If people try to cook with the sun for the first time outside of this time window, they should not be discouraged. Try again when the sun is more directly overhead. (One may also suspend the jar in the funnel, which will make cooking faster any time of the year.)
It is interesting to note that most developing countries are located near the equator where the sun is nearly directly overhead all the time. Solar Cookers will then serve year-round, as long as the sun is shining, for these fortunate people. They may be the first to apply fusion energy (of the sun) on a large scale! And they may accomplish this without the expensive infrastructure of electrical power grids that we take for granted in America.
How do you cook bread in a jar?
I have cooked bread by simply putting dough in the bottom of the jar and placing it in the funnel in the usual way. Rising and baking took place inside the jar in about an hour (during summer). One should put vegetable oil inside the jar before cooking to make removal of the bread easier. I would also suggest that using a 2-quart wide-mouth canning jar instead of a 1-quart jar would make baking a loaf of bread easier.
What is the optimum “opening angle” for the funnel cooker?
A graduate student at Brigham Young University did a calculus calculation over two years ago to assess the best shape or opening angle for the Solar Funnel. Jeannette Lawler assumed that the best operation would occur when the sun’s rays bounced no more than once before hitting the cooking jar, while keeping the opening angle as large as possible to admit more sunlight. (Some sunlight is lost each time the light reflects from the shiny surface. If the sunlight misses on the first bounce, it can bounce again and again until being absorbed by the black bottle.) She set up an approximate equation for this situation, took the calculus-derivative with respect to the opening angle and set the derivative equal to zero. Optimizing in this way, she found that the optimum opening angle is about 45 degrees, when the funnel is pointed directly towards the sun.
But we don’t want to have to “track the sun” by turning the funnel every few minutes. The sun moves (apparently) 360 degrees in 24 hours, or about 15 degrees per hour. So we finally chose a 60-degree opening angle so that the cooker is effective for about 1.2 hours. This turned out to be long enough to cook most vegetables, breads, boil water, etc. with the Solar Funnel Cooker. We also used a laser pointer to simulate sun rays entering the funnel at different angles, and found that the 60-degree cone was quite effective in concentrating the rays at the bottom of the funnel where the cooking jar sits.

Disclaimer

FAIR USE NOTICE: This site contains copyrighted material the use of which has not always been specifically authorized by the copyright owner. We are making such material available in our efforts to advance understanding of issues regarding health, safety, financial trends, and anything having to do with current and future political, social events etc. We believe this constitutes a 'fair use' of any such copyrighted material as provided for in section 107 of the US Copyright Law. In accordance with Title 17 U.S.C. Section 107, the material on this site is distributed without profit to those who have expressed a prior interest in receiving the included information for research and educational purposes. Notwithstanding the provisions of sections 106 and 106A, the fair use of a copyrighted work, including such use by reproduction in copies or phonorecords or by any other means specified by that section, for purposes such as criticism, comment, news reporting, teaching (including multiple copies for classroom use), scholarship, or research, is not an infringement of copyright. In determining whether the use made of a work in any particular case is a fair use the factors to be considered shall include—

(1) the purpose and character of the use, including whether such use is of a commercial nature or is for nonprofit educational purposes;

(2) the nature of the copyrighted work;

(3) the amount and substantiality of the portion used in relation to the copyrighted work as a whole; and

(4) the effect of the use upon the potential market for or value of the copyrighted work.

The fact that a work is unpublished shall not itself bar a finding of fair use if such finding is made upon consideration of all the above factors.